Overview
QQube can combine data from multiple QuickBooks company files in one QQube database. After the files are configured, scheduled synchronization can update the selected companies automatically without manual intervention.
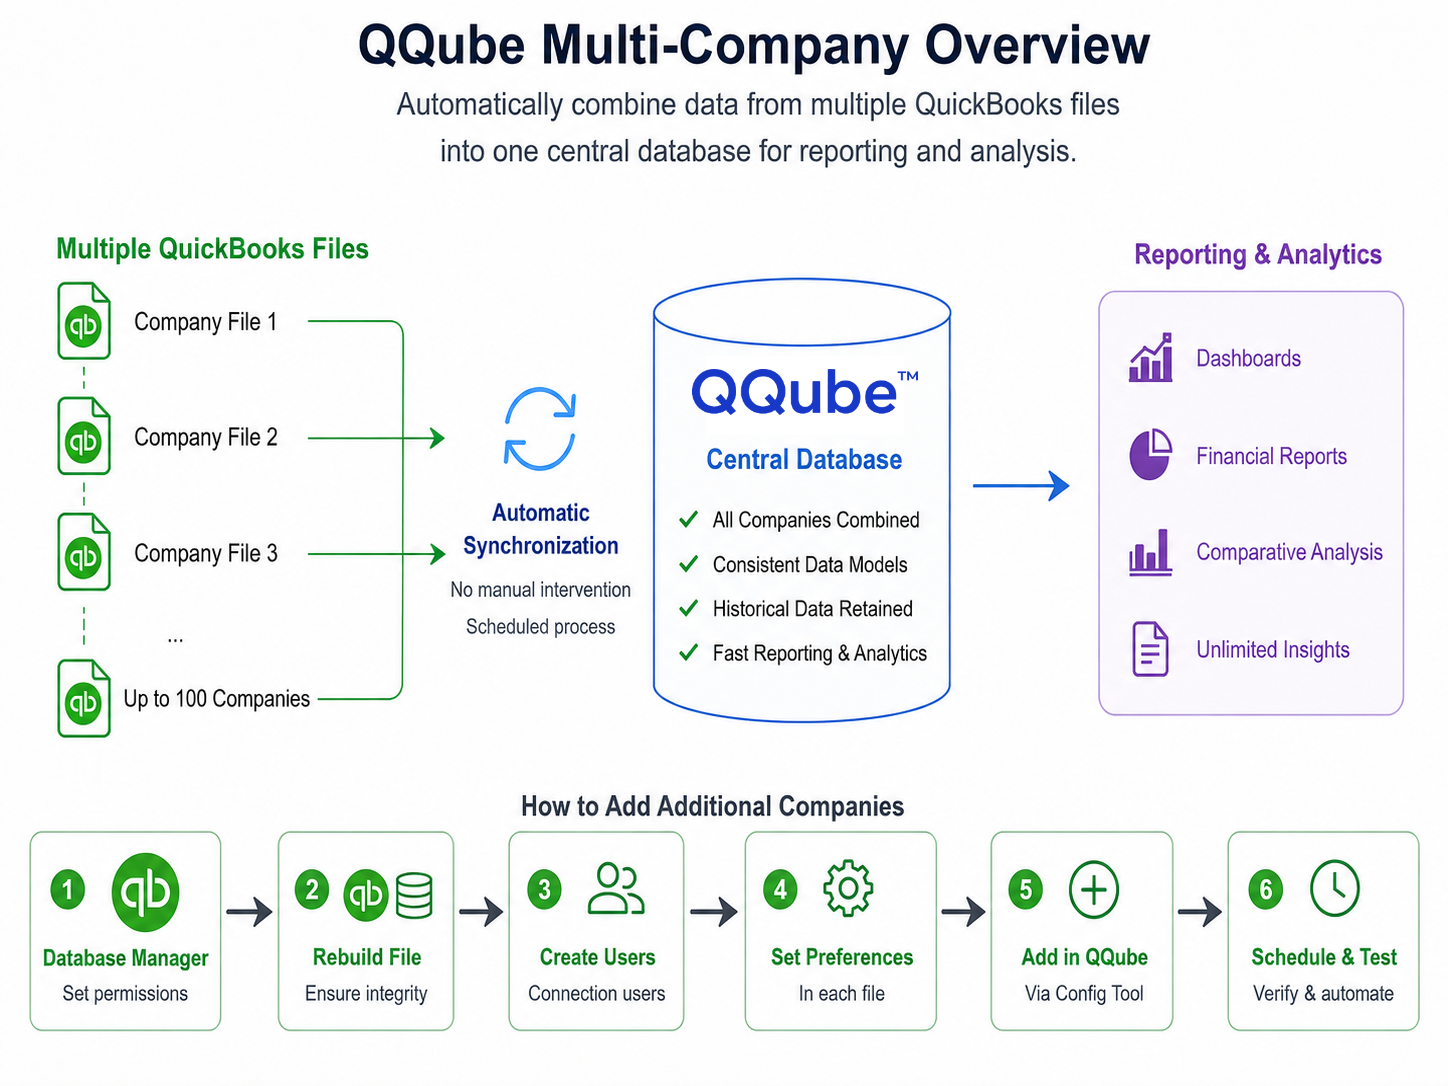
Multi-Company Add-On levels
Capacity and Performance
The practical number of companies and the amount of detail you should load depend on QuickBooks file size, selected data models, and available system resources.
For example, loading detailed general-ledger data from 100 company files larger than approximately 125 MB each may not provide acceptable performance. Financial summary data requires fewer resources and is usually a better choice for implementations of that size.
Customers also successfully synchronize several dozen larger company files in the 250 MB to 500 MB range, including detailed data. Actual performance will vary by environment and data selection.
Before You Add a Company
Use the Configuration Tool Wizard to add the first company. Complete the following preparation for every additional company file before connecting it to QQube.
Prepare each QuickBooks company file
- Confirm that the file has the correct Windows and QuickBooks permissions and is properly managed by the QuickBooks Database Server Manager.
- Run a rebuild to confirm data integrity. Review QuickBooks File Integrity.
- Create the required connection users. Each company file must use its own Intuit account for QQube, assigned the Secondary admin role, with a unique email address that is not used for another company file. Review Create QuickBooks Connection Users.
- Set the required QuickBooks preferences. Review Set QuickBooks Preferences.
Add a QuickBooks Company
Repeat this procedure for each additional QuickBooks company file you want QQube to synchronize.
1. Open the QQube Configuration Tool
Open the Configuration Tool from the Windows Start menu or the desktop shortcut.

2. Add the company
Expand Data Sources, select QuickBooks Company List, and then select Add.

3. Review the connection prompt
Sign in to the company file as the QuickBooks Administrator in Multi-User Mode, and then follow the displayed authorization instructions.

Before continuing
- Keep only one instance of QuickBooks running.
- Do not open QuickBooks by using Run as administrator. If the QuickBooks shortcut displays a shield, remove that setting from the shortcut properties.
Authorize QQube in QuickBooks
QuickBooks will display several authorization windows. Complete them in the following order.
1. Allow continuous access
Select Yes, always; allow access even if QuickBooks is not running.

2. Confirm the authorization
Select Yes when QuickBooks asks you to confirm the requested access.

3. Select the QQube user
Return to the Application Certificate window and select the dedicated QuickBooks user named QQube.

4. Confirm access
Complete the final QuickBooks access confirmation.

5. Enter the Enterprise reporting password
QuickBooks Enterprise users must enter the Custom Reporting User password, not the regular QuickBooks user password.

6. Verify the company
Confirm that the new company appears in the QuickBooks Company List.

Repeat for every additional company
Use the same process until every QuickBooks company file has been added to QQube.
Control Scheduled Synchronization
Use the company toggle to include or exclude individual files from scheduled synchronization.
Include or exclude companies
Use the toggle beside each company to control whether it participates in the scheduled synchronization.

Review scheduler options
Use the scheduler settings to control how and when the selected company files are synchronized.

Do not leave a company file open
When synchronizing multiple companies, do not leave QuickBooks open to a specific company file. The Intuit SDK allows QQube to close only a file that QQube opened.
Leave QuickBooks at No Company Open
Leave QuickBooks open at the No Company Open window. Do not minimize QuickBooks.

Test the Multi-Company Setup
After all company files have been added, run a simple test before relying on scheduled synchronization.
Run a short Manual Refresh test
- Open the Manual Refresh area in the QQube Configuration Tool.
- Select all QuickBooks company files.
- Select only QuickBooks Company Setup.
- Run the synchronization and watch each company connect and complete.
This data model loads quickly and makes modal windows, QuickBooks crashes, and login problems easier to identify.

Was this article helpful?
That’s Great!
Thank you for your feedback
Sorry! We couldn't be helpful
Thank you for your feedback
Feedback sent
We appreciate your effort and will try to fix the article