Overview
QQube uses dedicated QuickBooks credentials to connect to each company file and extract data without interfering with normal QuickBooks users.
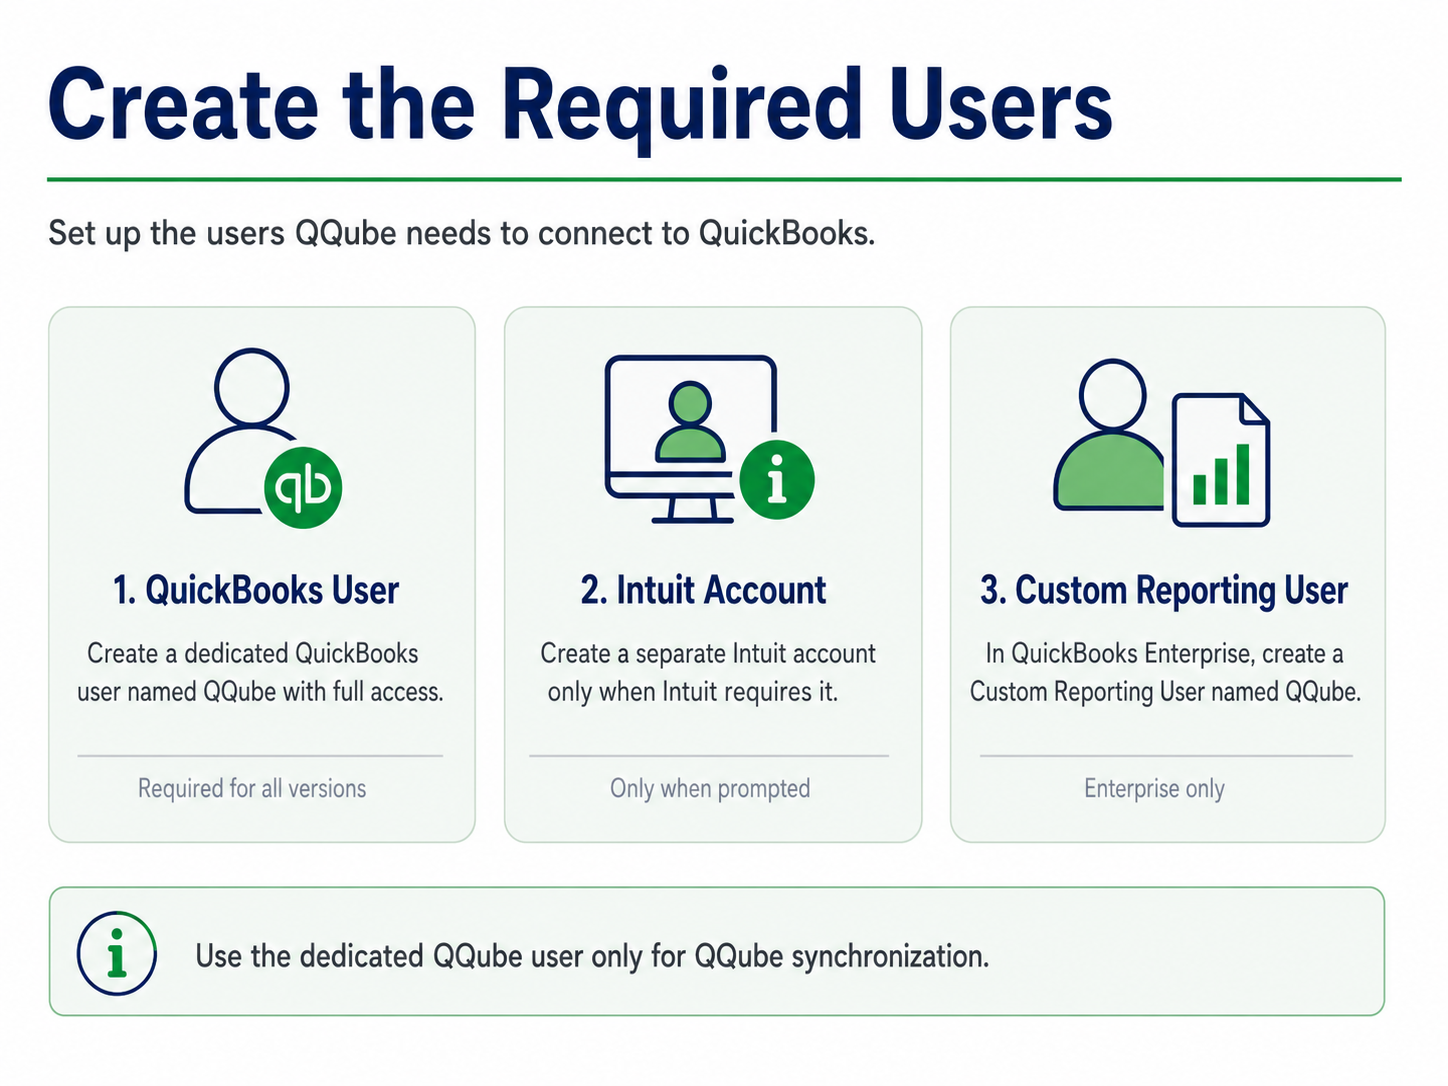
The regular QuickBooks user, the Intuit account used for unattended access, and the QuickBooks Enterprise Custom Reporting User are separate credentials. Each serves a different purpose.
Connection credentials used by QQube
- QuickBooks User: QQube — the regular QuickBooks company-file user used for Intuit SDK communication.
- Intuit Account for QQube — the Intuit account used for authentication when QuickBooks requires Intuit Account User Management.
- QQube Custom Reporting User — a separate QuickBooks Enterprise reporting user used for selected high-performance extractions.
Important
Use the dedicated QQube QuickBooks user only for QQube synchronization. Do not use it for normal QuickBooks access.
Create the QuickBooks synchronization user
Create a regular QuickBooks user named QQube. The QQube Configuration Tool uses this account to connect to the company file, extract the selected data, and close the QuickBooks session automatically.
A dedicated user avoids login conflicts when another person is working in QuickBooks while QQube is synchronizing.
QuickBooks Premier
Use these steps to create the dedicated QQube user in QuickBooks Premier.
Open the user setup area
Start the process for adding a new QuickBooks user.

Add the QQube user
Create a regular QuickBooks user named QQube.

Assign full permissions
Give the QQube user full access to the company file.

Finish the setup
Complete the user setup and save the new QQube user.

Time Tracking requirement
If Time Tracking is missing from the permissions screen, open Edit > Preferences > Time & Expenses and select Yes for Do you track time? The Intuit Software Development Kit (SDK) requires this setting even when you do not track time.
QuickBooks Enterprise
Use these steps to create the dedicated QQube user in QuickBooks Enterprise.
Open the Enterprise user list
Start the process for adding the new QQube user.

Assign full permissions
Give the QQube user full access to the company data.

Configure the Intuit Account for QQube
The Intuit Account for QQube is separate from the regular QuickBooks user named QQube. QuickBooks uses the Intuit account for authentication and protected connected services.
Many users already have an Intuit account without realizing that it is separate from their QuickBooks company-file login. For QQube, this distinction is important because the Intuit account must be configured specifically for unattended access.
Required configuration for unattended QQube access
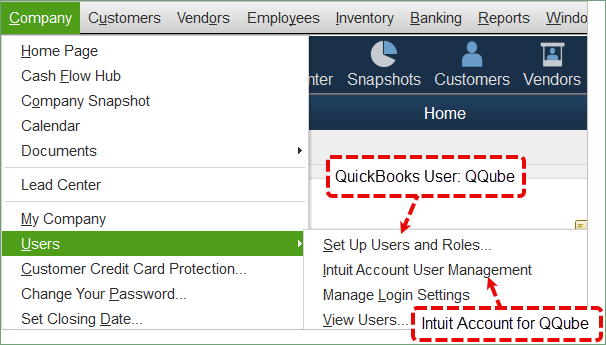
- Assign the Intuit account the Secondary admin role.
- Use a unique Intuit account for each QuickBooks company file.
- Use a different email address for each company file.
- Do not reuse the Intuit account assigned to the QuickBooks administrator or another QuickBooks user.
The relationship should remain one-to-one:
- One QuickBooks company file.
- One dedicated Intuit account for QQube.
- One unique email address for that Intuit account.
If QQube synchronizes multiple company files, repeat this setup separately for every file.
Why Secondary admin matters
This configuration allows QQube to sign in to QuickBooks automatically for unattended synchronization. It also prevents the recurring QuickBooks prompt that requires the Intuit user to reauthorize access.
Where to manage the Intuit account
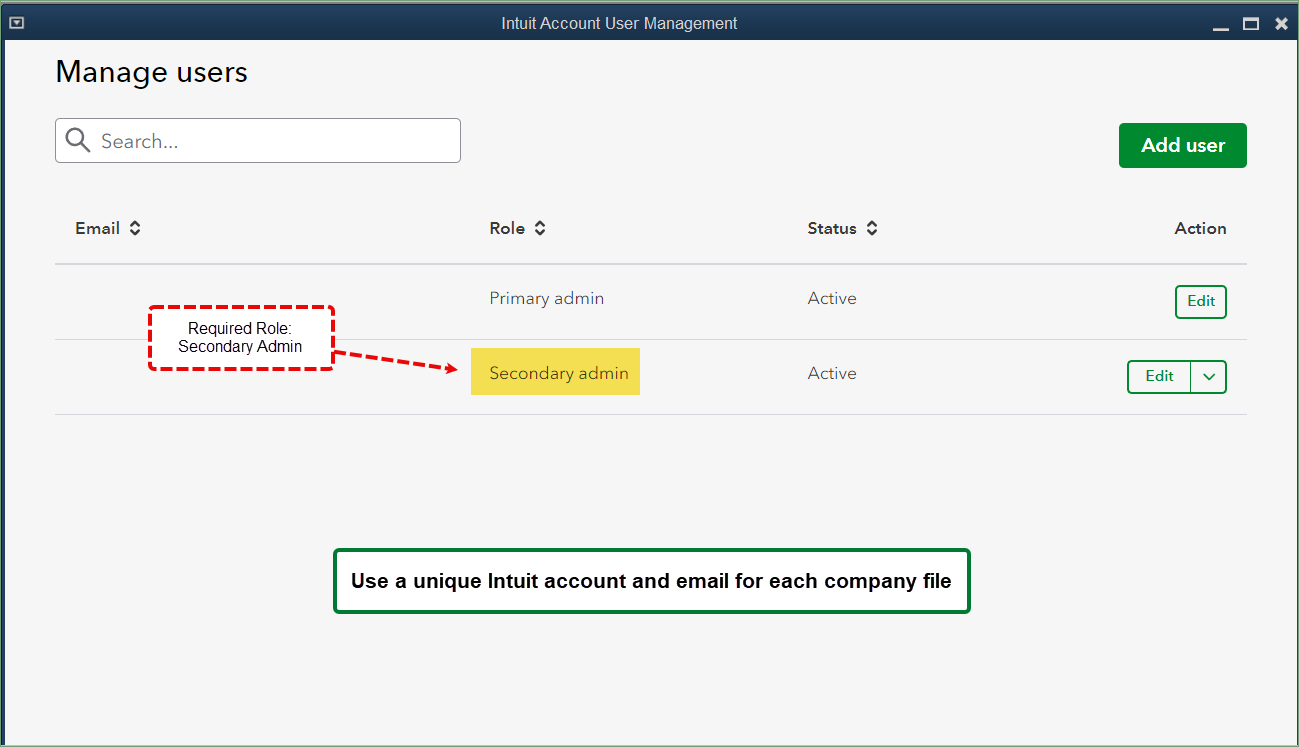
In QuickBooks, open Company > Users > Intuit Account User Management. Add or review the dedicated Intuit account for the company file and confirm that its role is Secondary admin.
When finished, verify that the account is active before continuing with QQube setup.
Create the Custom Reporting User in QuickBooks Enterprise
This section applies only to QuickBooks Enterprise. QuickBooks must be in Multi-user Mode for Custom Reporting.
The Custom Reporting User is separate from both the regular QQube QuickBooks user and the Intuit Account for QQube. It has its own credentials and permissions.
Beginning with QuickBooks Enterprise 2011, Intuit added a Custom Reporting User that allows selected reporting data to be accessed more directly. QQube uses this capability in selected operations to improve extraction performance.
Learn more about synchronization and extraction performance.
Why this user matters
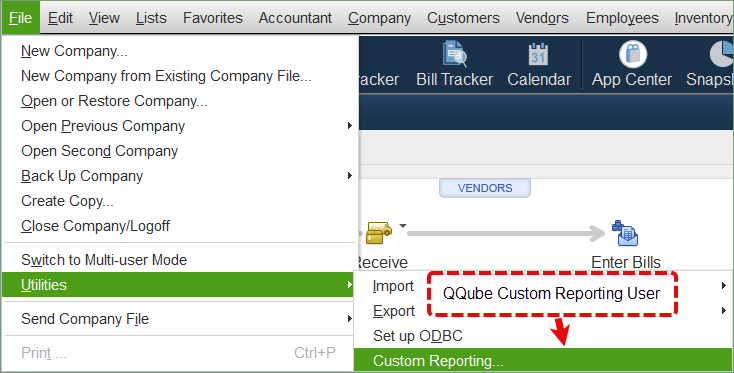
The Custom Reporting User helps QQube perform selected extractions more efficiently in supported QuickBooks Enterprise environments.
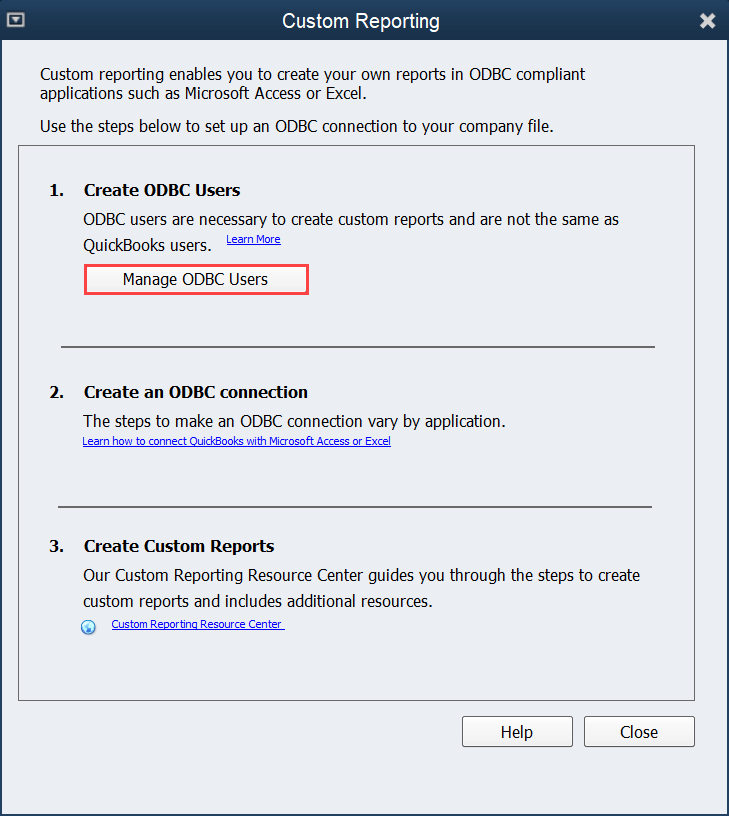
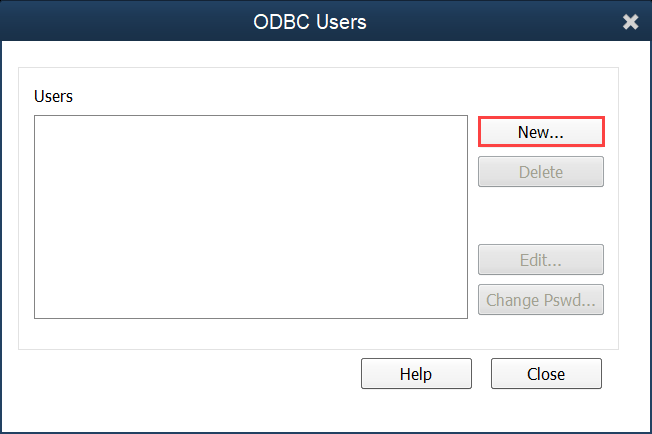
Create the reporting user
Create the Custom Reporting User and name it QQube.
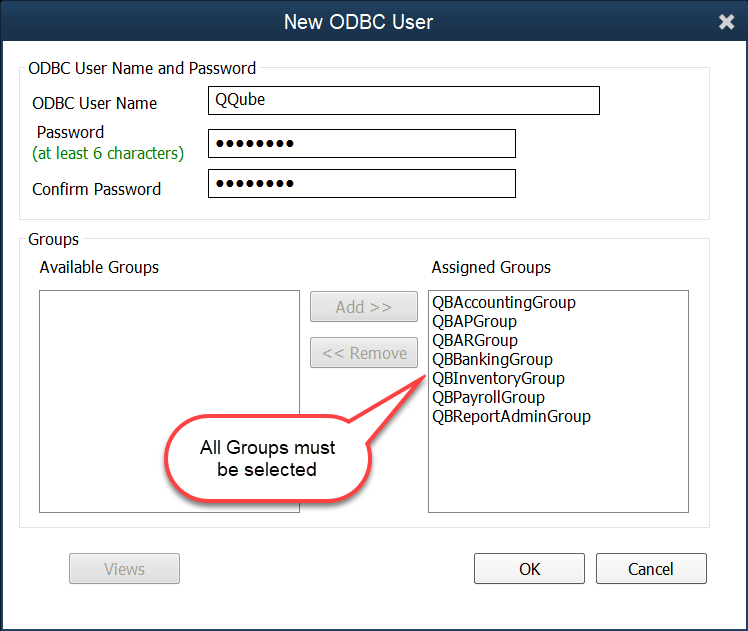
Set the permissions
Assign the permissions required for QQube reporting operations.
Finish the setup
Complete the final step and save the Custom Reporting User.
Expected result
When setup is complete, the QuickBooks company file should have the credentials required for reliable QQube synchronization:
- A dedicated QuickBooks user named
QQubewith full access. - A dedicated Intuit account for QQube, assigned as Secondary admin, with a unique email address for that company file.
- A separate Custom Reporting User named
QQubewhen using QuickBooks Enterprise.
For multiple company files
Repeat the Intuit account setup for every company file. Never reuse the same Intuit account or email address across company files.
Was this article helpful?
That’s Great!
Thank you for your feedback
Sorry! We couldn't be helpful
Thank you for your feedback
Feedback sent
We appreciate your effort and will try to fix the article