Overview
The QQube Synchronizer log tells you what to do when a synchronization fails. In most cases, you do not need to interpret the technical log text.
Every failed synchronization requires attention
Do not ignore a failed entry because a later synchronization reports Success. A later success only means that later run completed; it does not repair data left incomplete by the earlier failure.
Resolve each failed entry using its Status action. If the linked guide requires a clear and reload, complete that procedure before relying on the affected data again.
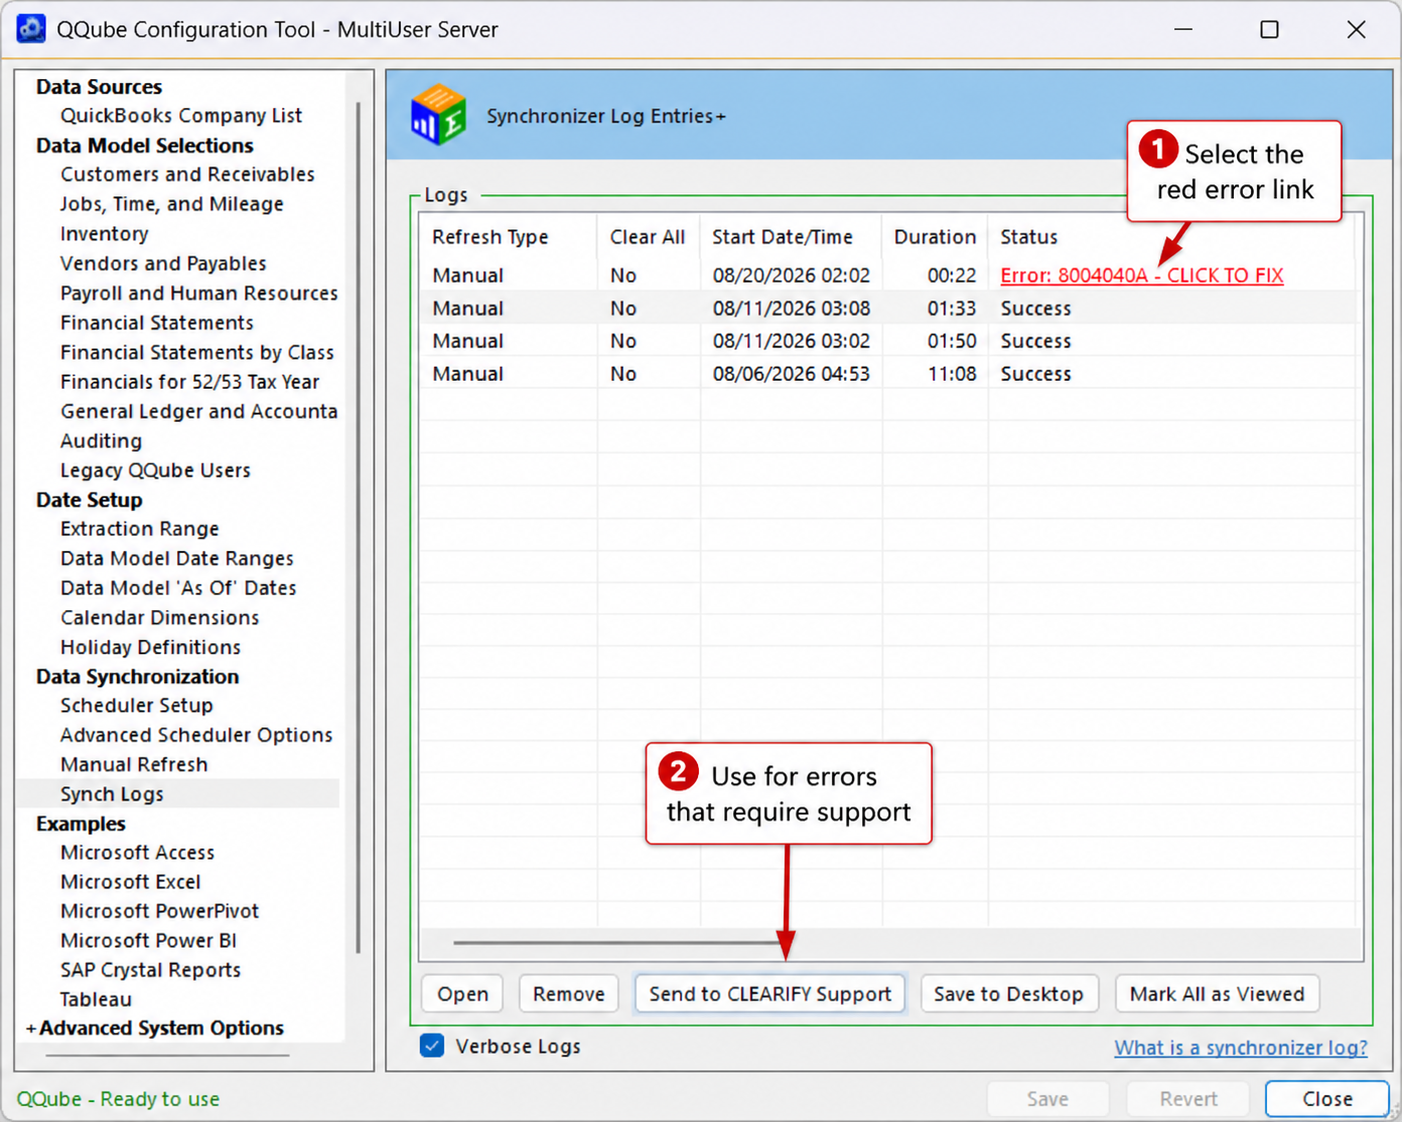
When a Red Status Link Appears
The synchronization log may contain technical text similar to the example below. The text is useful for reference, but the red Status link is the action to follow.
Example synchronization error
1. Open the Linked Guide
Select the red Status link beside the most recent failed synchronization.
2. Complete the Required Correction
Follow the corrective steps in the QQube guide that opens.
3. Synchronize Again
Run the synchronization again. If the same error returns, follow the escalation instructions in the linked guide.
When CLEARIFY Review Is Required
Use Send to CLEARIFY Support when the linked guide directs you to submit the synchronization information, when no specific corrective guide is available, or when a CLEARIFY representative requests the information for an existing case.
1. Send the Synchronization Information
Select Send to CLEARIFY Support. QQube prepares the synchronization information needed for review and begins the support-ticket submission process.

2. Confirm the Submission
Select OK when prompted. QQube confirms that the synchronization information was sent.

After the ticket is created, you will receive the website login information needed to view the ticket and respond to CLEARIFY comments.
What to Do Next
After completing the required correction, run the synchronization again. If it succeeds, refresh the affected report. If the same error returns, use its Status link again and follow the escalation instructions in that guide.
Was this article helpful?
That’s Great!
Thank you for your feedback
Sorry! We couldn't be helpful
Thank you for your feedback
Feedback sent
We appreciate your effort and will try to fix the article