Overview
CLEARIFY Support may ask you to capture advanced synchronization logging for a specific support case. Advanced logging records additional synchronization detail that can help Engineering diagnose an issue that cannot be resolved from the normal synchronization log.
Use advanced logging only when requested
Enable it only for the issue CLEARIFY Support asks you to reproduce. After the issue occurs, save the verbose log and attach it to the existing support ticket.
Capture the Advanced Log
1. Open Synch Logs
In the QQube Configuration Tool, select Synch Logs.
2. Enable Advanced Logging
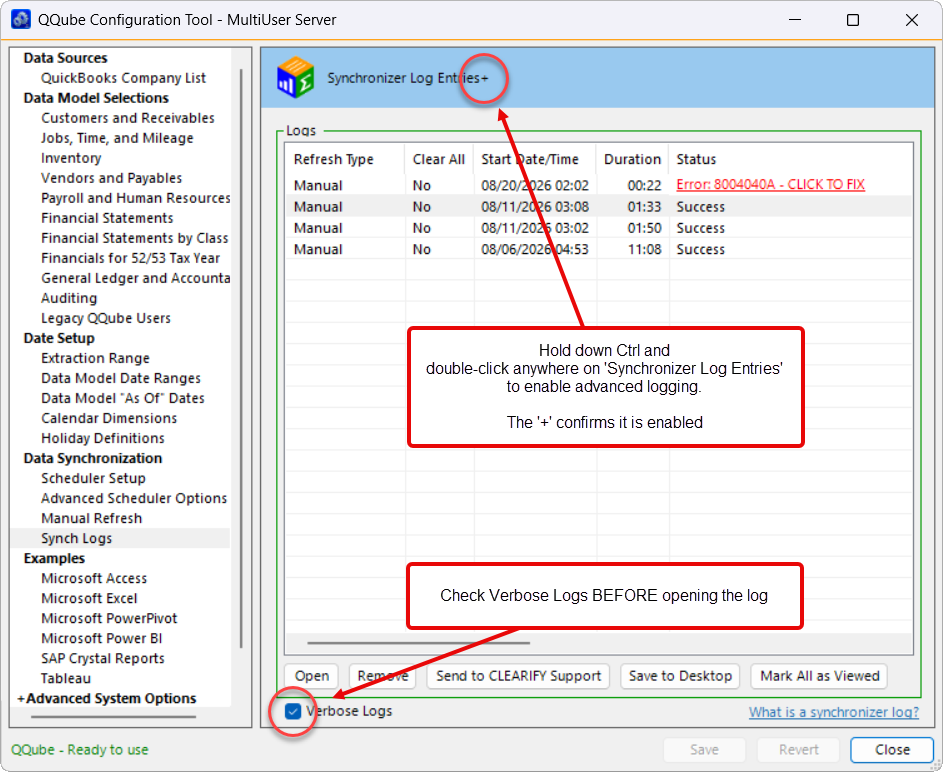
Hold down the Ctrl key and double-click Synchronizer Log Entries at the top of the QQube Configuration Tool.
A plus sign appears after Synchronizer Log Entries when advanced logging is active.
3. Reproduce the Issue
Run the synchronization and allow the reported issue to occur again. The additional diagnostic detail is written to the log during that synchronization.
4. Save the Verbose Log
Highlight the applicable synchronization entry, check Verbose Logs, before opening and then saving the log as a text file.
Attach the saved text file to the existing CLEARIFY support ticket.
Send to CLEARIFY Support may be unavailable
In versions later than Build 507, Send to CLEARIFY Support is disabled while advanced logging is active because the verbose log may be too large to submit through that option.
Expected Result
The synchronization issue is reproduced with advanced logging enabled, and the resulting verbose log is saved as a text file for CLEARIFY Engineering to review.
Was this article helpful?
That’s Great!
Thank you for your feedback
Sorry! We couldn't be helpful
Thank you for your feedback
Feedback sent
We appreciate your effort and will try to fix the article