Overview
A clean QQube reinstallation removes the existing QQube installation, database service, program folders, databases, examples, and registry settings before installing again.
Use this procedure only when a normal uninstall and reinstall has not resolved abnormal installation behavior, duplicate installations, damaged configuration, or unexplained startup errors.
Last-resort procedure
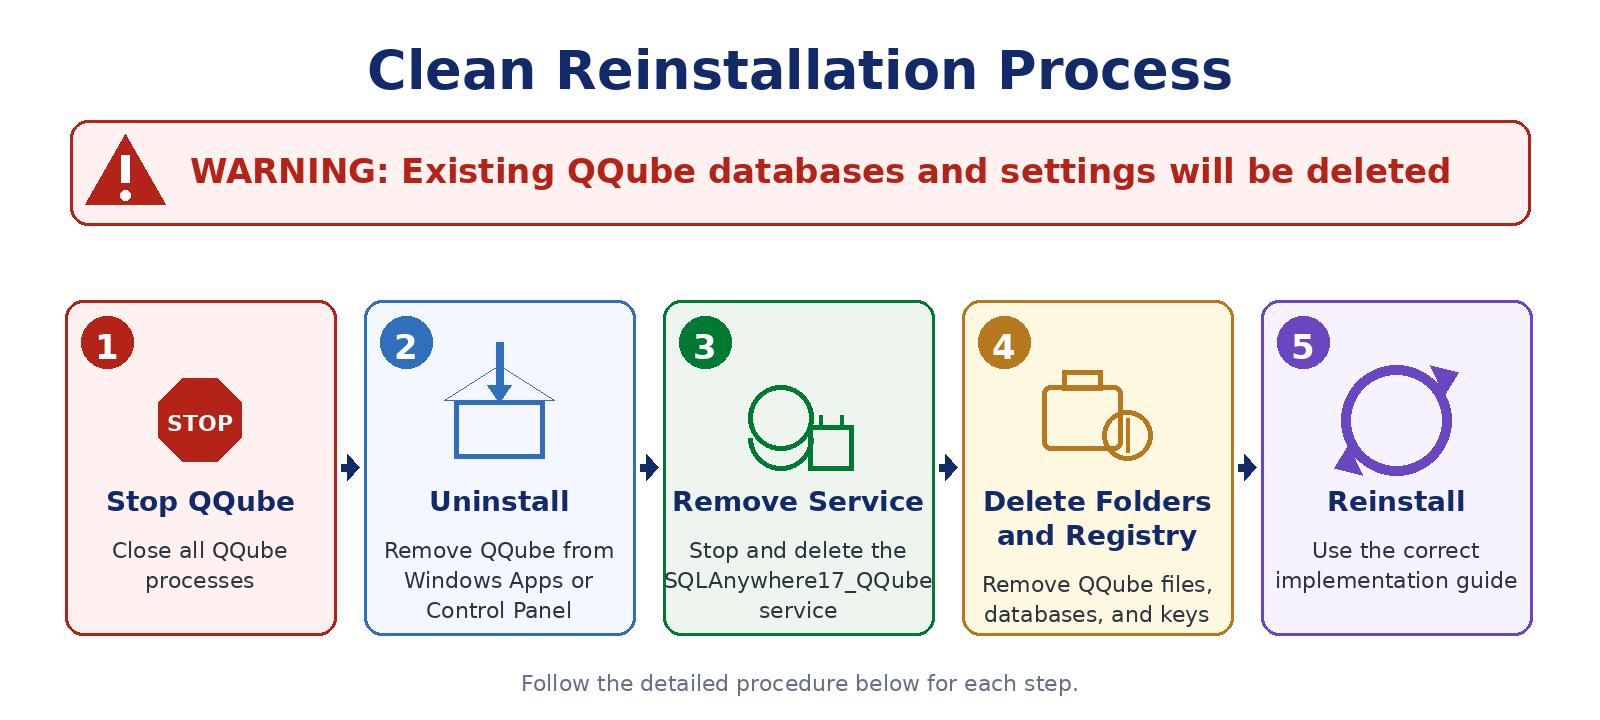
This process permanently removes existing QQube databases, configuration settings, and installed examples.
Move any custom reports, examples, or other files you need to keep to a folder outside the CLEARIFY and QQube directories before proceeding.
Before You Begin
- Have full administrative rights to the computer.
- Use the Windows user under which QQube was originally installed whenever that user can be identified.
- Have all users close the QQube Configuration Tool.
- Move any custom reports or files stored inside QQube folders to another location.
- Have the appropriate QQube implementation guide available for the new installation.
Step 1: Stop QQube and Uninstall
Close all QQube processes
Open Windows Task Manager and review processes for all users.
End any running instances of:
qqubesynchronizer.exe- QQube Configuration Tool

Uninstall QQube
Give the original QQube installation user full administrative rights, then uninstall QQube through Windows Apps or Control Panel.
If the original user is unknown, Task Manager may help identify the Windows user that normally runs the QQube Synchronizer.
Continue with the remaining steps even when the uninstall succeeds so you can verify that all components were removed.
Step 2: Remove the QQube Database Service
Open the Windows Services application and locate SQLAnywhere17_QQube. Very old QQube installations may use a SQL Anywhere 12 service instead.
Stop the service
Stop the QQube SQL Anywhere service if it is still running.

Delete the service
Open Command Prompt using Run as administrator, then run the service-removal command shown below.

Step 3: Delete the QQube Directories
Before deleting any folders, confirm that:
- No QQube Synchronizer process is running for any Windows user.
- No QQube Configuration Tool process is running for any Windows user.
- The QQube SQL Anywhere service has been removed.
Permanent deletion
The following folders contain program files, examples, configuration files, and QQube databases. Deleting them removes those items permanently.
Delete the CLEARIFY and QQube folders shown below, including their files and subfolders:


Step 4: Delete the QQube Registry Entries
Advanced administrative step
Delete only the CLEARIFY and QQube registry keys shown below. Incorrect registry changes can affect Windows or other installed applications.
Open regedit.exe and delete the indicated keys and all of their subkeys:

Step 5: Reinstall QQube
The computer is now ready for a new QQube installation.
Follow the appropriate Implementing QQube for QuickBooks guide from the beginning.
- Create or confirm the required QuickBooks connection users and permissions before beginning.
- Use the QQube Configuration Wizard to create the new configuration.
- Allow QQube to create and populate a new database.
- Open your existing reports and refresh them after the new synchronization is complete.
Expected Result
QQube should be installed as a single, clean instance with a new database, new configuration settings, and no remaining components from the damaged or duplicate installation.
Was this article helpful?
That’s Great!
Thank you for your feedback
Sorry! We couldn't be helpful
Thank you for your feedback
Feedback sent
We appreciate your effort and will try to fix the article