Overview
This guide explains how to install the QQube Multi-User Edition on a local Windows network.
The Multi-User Edition uses two installation types:
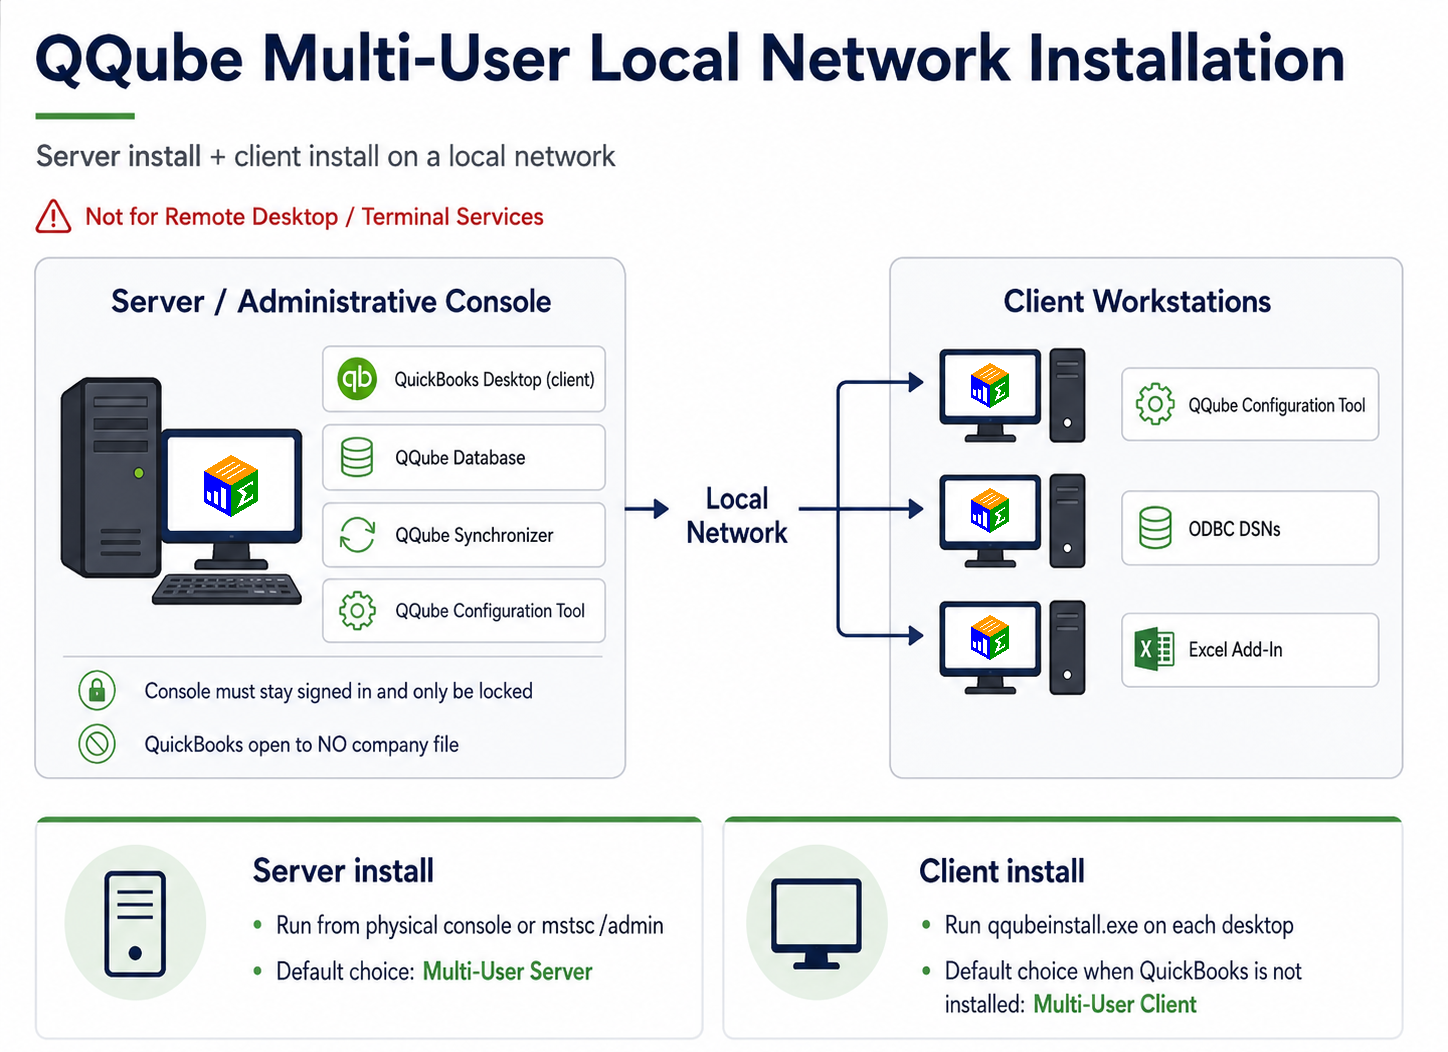
- Multi-User Server — Installed once on the server administrative console. It contains the QQube Database, QQube Synchronizer, and QQube Configuration Tool.
- Multi-User Client — Installed on each reporting workstation that connects to the QQube Database.
Local network installation only
This guide does not cover Remote Desktop or Terminal Services environments. Use the Multi-User Remote Desktop Environment guide instead.
Pre-install requirements
- Review the current requirements.
- Install and activate the full QuickBooks Desktop application under the server administrator account.
- The administrative console must remain signed in. It may be locked, but it cannot be logged out.
- Leave QuickBooks open with no company file selected under the server administrator account.
Why this is required
The Intuit SDK allows QQube to communicate with QuickBooks Desktop only through the QuickBooks client. It does not allow that communication to run as a Windows service.
Install the Multi-User Server
1. Access the server console
Install the server portion while signed in to the administrative console.
You may use either of these methods:
- Sign in directly at the physical console.
- Connect remotely to the administrative console by running
%windir%\system32\mstsc.exe /admin.
Keep the console signed in
After installation, the console must remain signed in and may only be locked. If the console is logged out, QuickBooks cannot remain open and QQube cannot extract data.
2. Download and start the installer
Download the current QQube installer: qqubeinstall.exe.
Double-click qqubeinstall.exe while signed in to the server administrator account.
What the server installation includes
- QQube Database.
- QQube Synchronizer.
- QQube Configuration Tool.
3. Choose Multi-User Server
The installer defaults to Multi-User Edition - Server when it is run on a server. Select that option, then click Next.

4. Review the Excel Add-In option
If Microsoft Excel is not installed on the server, the Excel Add-In option will be unavailable. This is normal on a non-Remote Desktop server.

5. Keep the default installation folder
Keep the default installation folder. It should not be changed.

6. Begin the installation
Review the installation choices, then click Install to begin copying files and installing the required components.

7. Wait for the installation to complete
The installer displays progress while QQube files and components are installed.

8. Finish the server installation
Click Finish to complete the Multi-User Server installation.

Install the Multi-User Client on reporting workstations
Run the same qqubeinstall.exe on each reporting workstation that will connect to the QQube Database.
What the client installation includes
- QQube Configuration Tool for viewing synchronization logs and starting a manual synchronization.
- QQubeFinancials and QQubeUser System DSNs.
- QQube Excel Add-In, when Microsoft Excel is installed.
1. Choose Multi-User Client
Select Multi-User Edition - Client, then click Next.

2. Automatic client selection
If QuickBooks is not installed on the workstation, the installer automatically selects Multi-User Edition - Client.

3. Connect to the QQube Database
QQube searches the local network for the QQube Database. Confirm the server connection when it appears.

4. Resolve a missing server connection
If the client cannot locate the QQube Database, use the Multi-User Client Cannot See Server guide.

Next steps
Was this article helpful?
That’s Great!
Thank you for your feedback
Sorry! We couldn't be helpful
Thank you for your feedback
Feedback sent
We appreciate your effort and will try to fix the article