Overview
Use this guide when QQube must be reinstalled, moved, or rebuilt because of:
- A workstation or server failure.
- The purchase of a replacement computer.
- A move to another workstation.
- A migration from an old server to a new server.
QQube data is rebuilt, not migrated
The QQube Database is read-only for reporting. Existing QQube data is not migrated or restored. After installation, QQube reconnects to QuickBooks and rebuilds the required data.
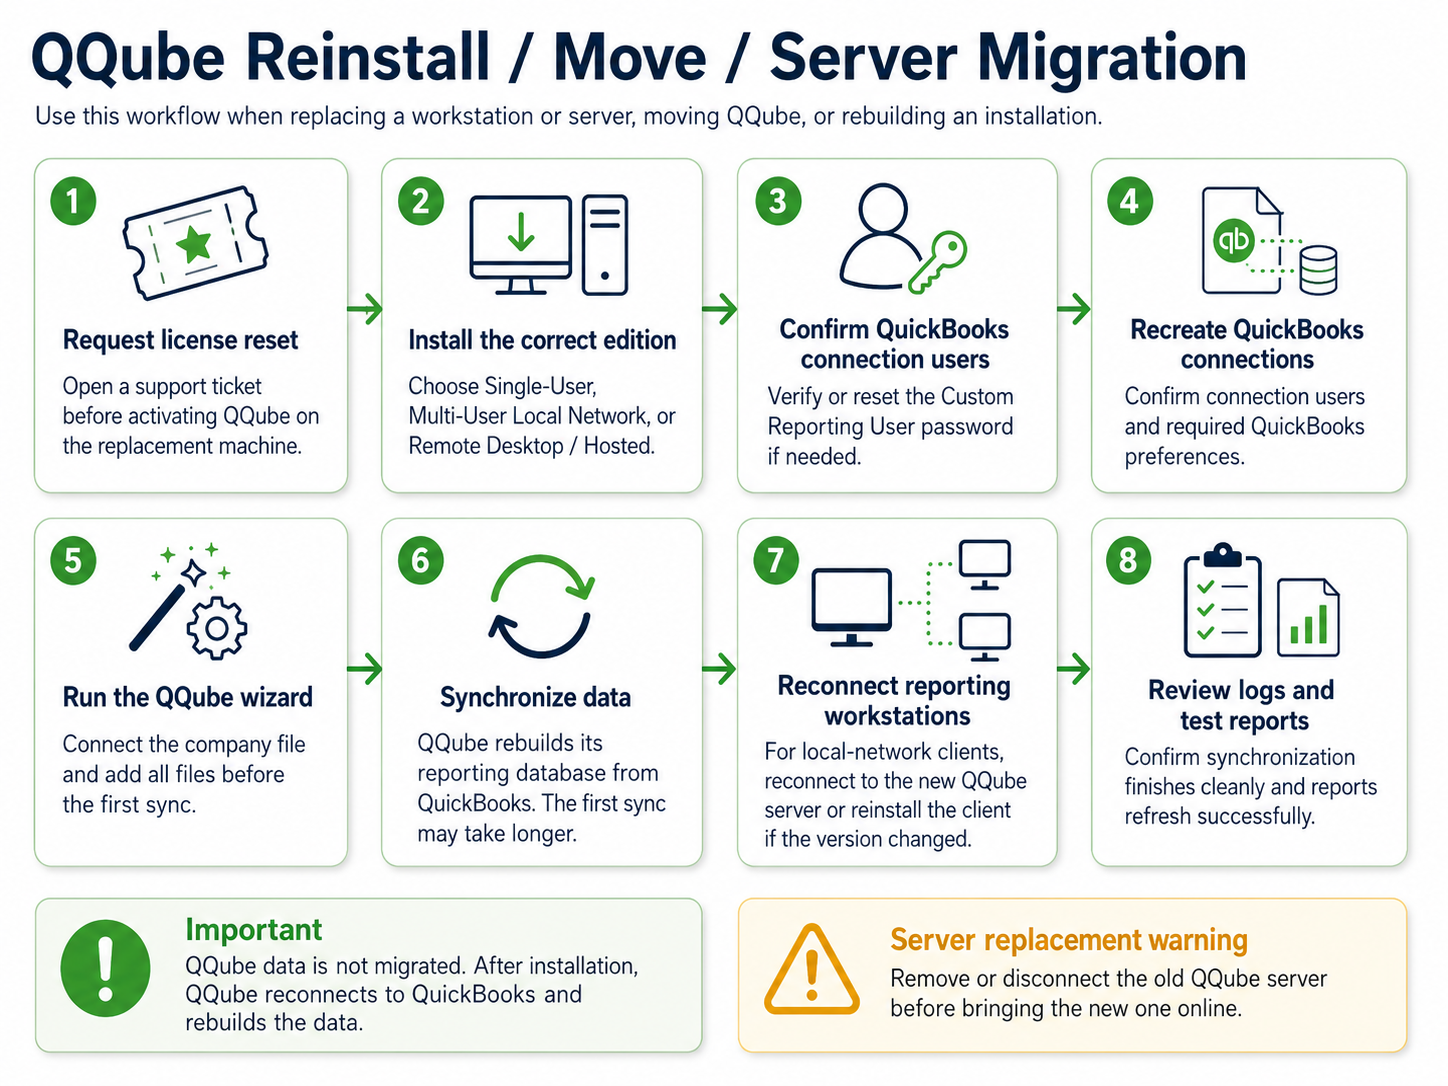
1. Request a license reset
Locate the QQube License ID and create a support ticket requesting a reset before activating QQube on the replacement computer or server.
If the License ID is unavailable, include one of the following in the ticket:
- The customer or company name.
- The approximate original purchase date.
- The purchase receipt or order number.
Without the reset, activation may return error 5103.
2. Install the correct QQube edition
Select the installation guide that matches the new environment:
- Single-User Installation — Use when one person runs QQube on a desktop or laptop. Do not install the Single-User Edition on a server or in a Remote Desktop environment.
- Multi-User Local Network — Install the server portion where the QQube Database and QuickBooks client reside. The database is then shared with reporting workstations on the local network.
- Multi-User Remote Desktop or Hosted Environment — Use when reporting users sign in remotely to a shared server.
Server replacement warning
Uninstall QQube from the old server or completely disconnect the old server from the network before bringing the new QQube server online. Leaving both installations available can cause reporting workstations to connect to the wrong QQube Database.
3. Confirm the QuickBooks connection users
Before reconnecting each QuickBooks company file, confirm that the required connection users still exist.
Intuit Account for QQube
For unattended synchronization, each QuickBooks company file must have its own Intuit Account for QQube, assigned the Secondary admin role, with a unique email address. Do not reuse the same Intuit account or email address across company files.
For QuickBooks Enterprise, also confirm that the Custom Reporting User exists and that you know its password. Reset the password before reconnecting QQube when the existing password is unknown.
Locate the Custom Reporting User
Open the QuickBooks user-management area and locate the Custom Reporting User used by QQube.

Review the user settings
Confirm that the required Custom Reporting User exists before continuing.

Change the password when necessary
For QuickBooks Enterprise, change the Custom Reporting User password when the existing password is unknown.

Save the new password
Record the password securely. It will be required when QQube reconnects to the QuickBooks company file.

4. Recreate the QuickBooks connections
Confirm that the required Connection Users exist and that the appropriate QuickBooks Preferences are configured.
5. Run the QQube Configuration Wizard
Run the QQube Configuration Tool Wizard.
When the installation includes multiple QuickBooks company files, do not begin synchronization yet. First review the Multi-Company Setup guide and add the remaining company files.
6. Synchronize the data
Run the first synchronization by following How the Synchronization Process Works.
QQube rebuilds its reporting database from the connected QuickBooks company files. The first synchronization may take substantially longer than later incremental synchronizations.
7. Reconnect local-network reporting workstations
This section applies only when a Multi-User Local Network server has been replaced and existing reporting workstations must connect to the new QQube server.
When the replacement uses a newer QQube version
Install the Multi-User Client portion on each reporting workstation by following the Multi-User Local Network Installation guide.
When the replacement uses the same QQube version
Do not reinstall the client portion. Open the QQube Configuration Tool on each workstation and reconnect the existing client installation to the new server.
1. Acknowledge the connection error
The existing client initially reports that it cannot find the QQube server. Click OK.

2. Search for the new QQube server
Use the server-selection window to search the local network for the new QQube Database engine.

3. Select the new server
Select the QQube server returned by the network search.

4. Save the engine name
Save the new QQube engine name. QQube updates the workstation's System DSNs to use the replacement server.

5. Confirm the new server connection
After the new engine name is saved, the workstation returns to the QQube Configuration Tool.

If the new server is not found
Temporarily disable the Windows firewall on the workstation and then on the server to isolate the connection problem. Group Policies and firewall rules may block server discovery. Restore the firewalls after testing and configure the required permanent exceptions.
8. Review the synchronization logs
Check the QQube synchronization logs and resolve all errors before opening existing reports.
9. Test the reports
Open representative Excel, Power BI, Access, Crystal Reports, or other reporting files and confirm that they refresh successfully.
No manual connection strings should be required. The QQube installation and client reconnection procedures configure the required System DSNs. Verify only that:
- The required data models are selected and loaded.
- The first synchronization completed without errors.
- The reporting workstation is connected to the correct QQube server.
Was this article helpful?
That’s Great!
Thank you for your feedback
Sorry! We couldn't be helpful
Thank you for your feedback
Feedback sent
We appreciate your effort and will try to fix the article